We began the year with a one day group activity that had everyone engaged in creative problem-solving, reviewing past concepts and skills, and working respectfully and successfully as a group. By the end of the class period, every student had contributed something to a whole class set of art! Everyone had a blast!


 Here's what we did:
The Set-up:
Since we were moving out of the art room soon, I took advantage of that and arranged the tables specifically for this activity, creating what we like to call "MEGA table," which consisted of 7 of our large tables pushed together in the middle of the room, surrounded by 30 stools. Every individual table in the arrangement had a basket of twist-able crayons to share, and each individual seat had a post-it with a number on it.


Getting Started:
Students chose their seat and wrote their number on the back of their paper with a crayon. At the end of the activity, all artwork was returned to it's original creator, but putting a number instead of a name on the back kept it anonymous during the activity. I used two auditory signals for this activity - the first meant for the students to pass their paper to the person on their right, and the second meant for the student to put their hands up and their eyes on me. The signals were both played on the same instrument, so students really had to listen to determine which signal I was playing.


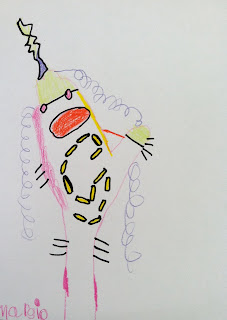
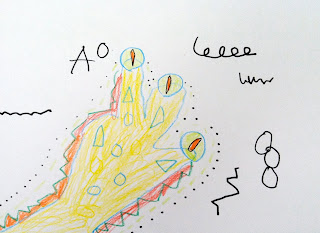
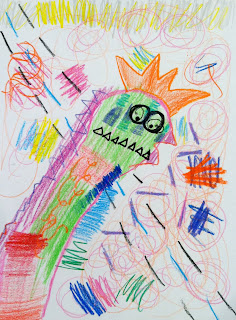
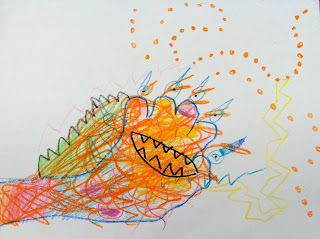
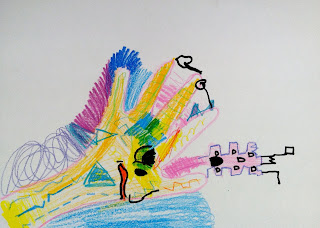
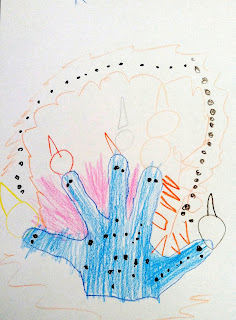
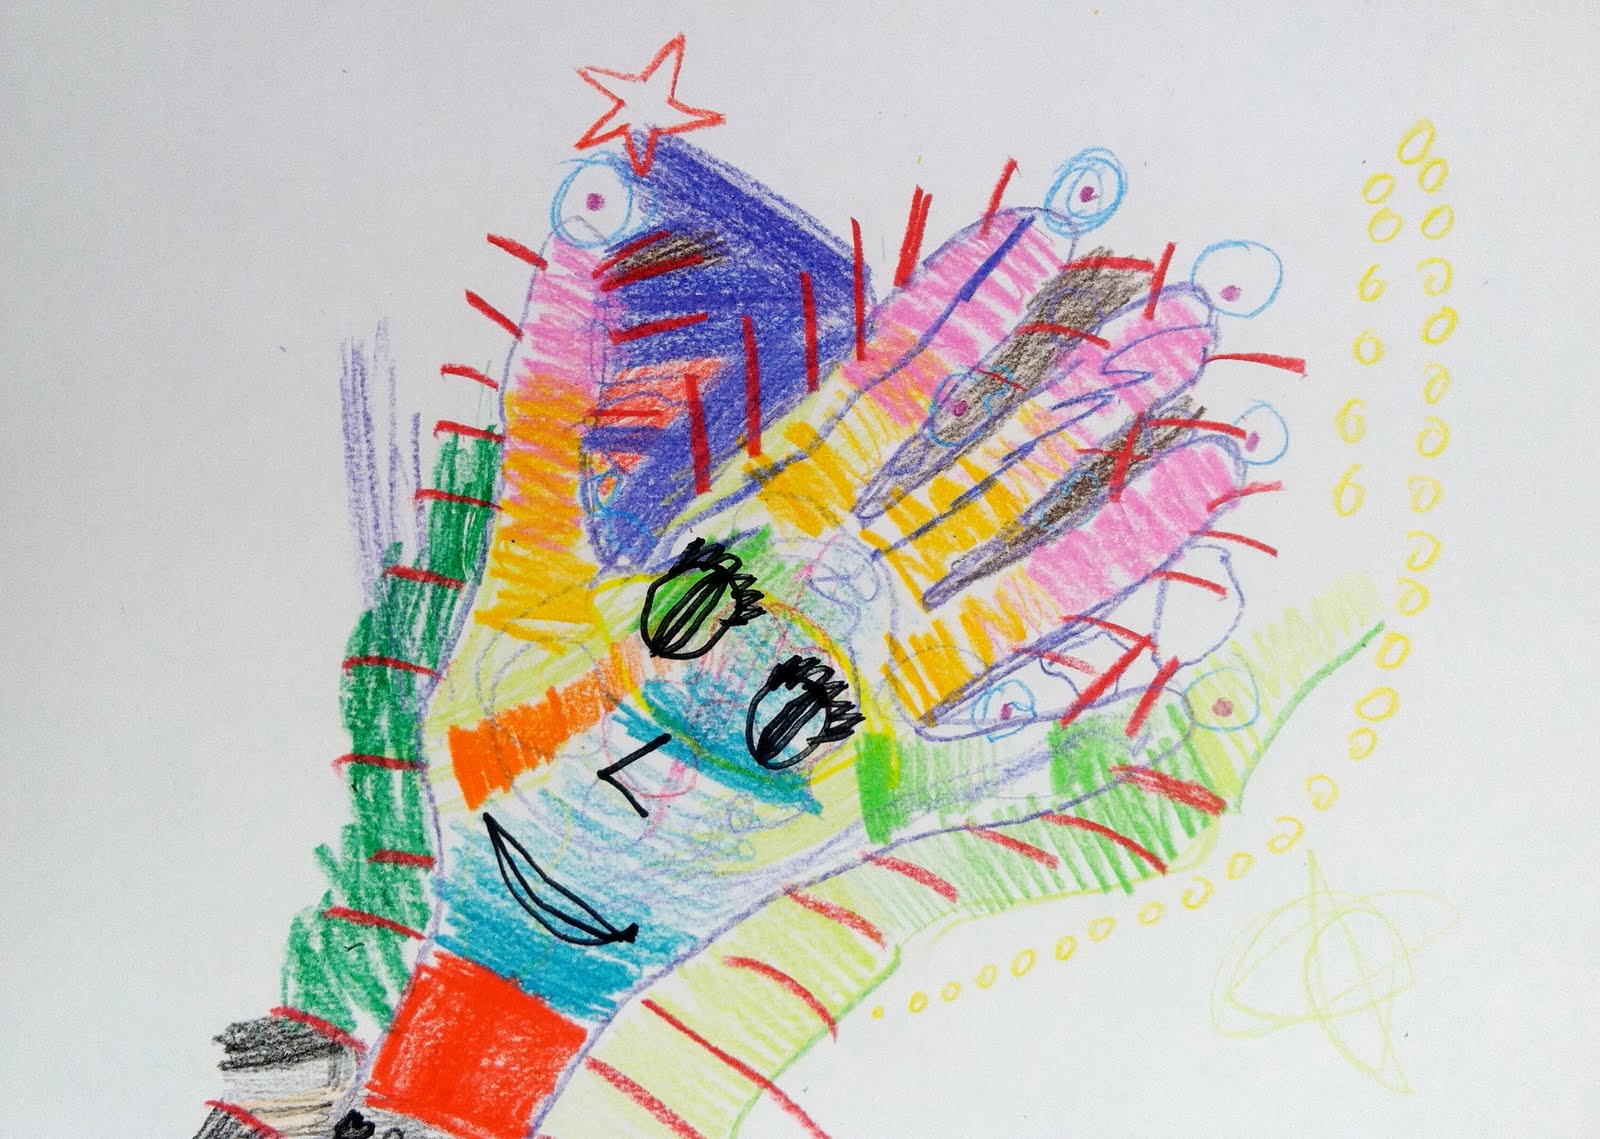
Students were instructed that they were going to collaboratively create a creature, but could only add to the creature something from the art vocabulary card that I held up during each turn. We decided we were going to assume that anything anyone added to the artwork was intended to make it more interesting or beautiful. Each student started their monster by tracing their hand and wrist in an interesting position to start the creature's body or head.
Then, the passing began!


Collaborating:
For every turn, I held up a card; cards included types of shapes, lines, compositional techniques (such as overlapping, cropping and repetition,) shading techniques, and color families. For some turns, students had to listen to directives about how to add the element on the card (such as "
attach this element to the
inside of the creature", or "choose a section of the creature and color it in using this shading technique with colors from the family on this card.") Towards the end, we began passing the art in a more rapid-fire succession; each student was supposed to quickly look at the creature and decide something they could add as a final detail to make the artwork stronger. This could be any element or technique that we had discussed before.


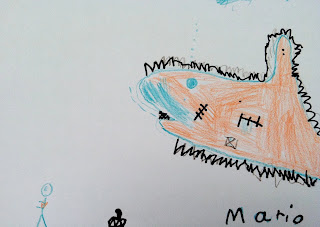
When the art had rotated around the entire circle, and each drawing was in the hands of the person sitting to the left of the original owner, the paper was flipped over so that only the number showed. Before the final pass, I gave students their final instructions. "When you get your number back, write your name on your paper, then flip it over. Remember to be respectful, since this art was worked on by everyone in the class. Take a look at your amazing creature! Finish your creature by adding some final distinctive details (including facial features) with a black Sharpie."


Closing:
We finished class with a gallery walk (walking to our right around mega-table, looking at every work of art.) Students delighted in the final results - even when the final work was completely the opposite of what they had expected. This was a truly fun and effective activity. I even participated!
*For first and kinder, we did this activity without the collaborative element, and with more simplified directives on the cards. This works great too!
P.S. Hopefully there will be a post coming soon updating everyone about my current teaching set-up. I don't have a "classroom" exactly, but I'm not a-la-cart either. This year has been a big challenge so far, but my students are making great art as always. I have had my hands pretty full since the move, and blogging is pretty hard to find time for these days. Hope to post again sometime soon... There are some great works of art I would really love to share here!
 Please head on over and check it out! If you are a follower here, I would love it if you would follow us on the new blog! I'm glad to be back on a regular posting schedule, and eager to share more of the wonderful things that we are doing here at Briargrove Elementary. Thank you for reading, supporting, commenting, and celebrating here on the Briargrove Art Page. So excited for you to come on over and continue on this journey together!


.jpg)


