

Last year, third great had a fun time brainstorming ideas for machines that would help solve some of the environmental issues currently threatening our planet. The students each chose an issue that they felt passionate about, such as air pollution or animal endangerment, designed a helpful, eco-friendly machine, and then built that machine using cardboard and other found materials on a sheet of thick, stiff cardboard.


A collograph printing plate is like a collage of found materials that works similarly to a stamp. All materials should be raised to about the same height for the best results. We used cardboard boxes cut into squares as the base of the plate, and more cardboard, scraps of yarn, soda tabs, netting and bubble wrap for our plates. The final plates were coated with a thick layer of gloss medium. Not only does this help keep pesky items stuck down, it also creates a protective seal that allows for the plate to be printed multiple times. (To print again with a different color, simply wipe ink away with a wet sponge and pat dry.)


When students were ready to print, I set up tables with different colors of water-based printing inks. Students chose colored construction paper to print on, wrote their names on the back in pencil, and then spritzed their papers with a little water to make them more absorbent and flexible. The students quickly painted the entire surface of the plate with ink, then placed it on their plate. Plate and paper were then flipped together so that the paper is on top (this is crucial.) Then, students used a scrap piece of construction paper as a cover and began to push and rub all over the surface. We also used the handles of the scissors to rub with. This causes the ink to transfer onto the paper. Students were reminded not to spend too much time rubbing, or the paper might rip when pulled off the plate.


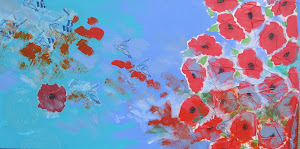
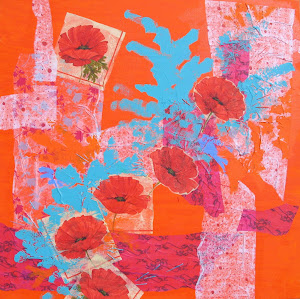
Some students used plain construction paper to print on, while others created collages that corresponded with their plates to print on. After printing, many students decided to paint their final plates and save them as works of art. We liked that so much, I may just change this to a relief sculpture unit! Here are some of the beautiful prints:


5 comments:
I love the composition in these prints!!!! Really impressive for 3rd grade!
Me gusta muchísimo esto y todo lo que hacéis.Enhorabuena por este estupendo blog!
Un abrazo.
Marta
Beautiful. A stand out for a different aesthetic for kids art! Really lovely and intriguing!
love this!
I just took a Monoprinting workshop, and it was really fun! I am so going to try this with my kids. How did you rolled the ink, and what kind of set up did you do?
Also, I posted about a group 3D project, a model of a city, that I did. Please take a look, and let me know what you think. http://bluefroginthetub.blogspot.com/2011/01/long-term-city-project.html
You have been very inspirational to me. I started incorporating more materials in my student's art, once I saw your blog.
Moitreyee
www.bluefroginthetub.blogspot.com
Post a Comment